Roti Preparation: Simple Steps for Soft, Fluffy Flatbread
If you’ve ever wondered how to make roti that feels just right, you’re in the right place. No fancy equipment, no mystery ingredients – just a few basics and a bit of practice. Grab a bowl, a rolling pin, and a hot tawa or skillet, and let’s get it rolling.
Ingredients You Need
All you really need are three things: whole‑wheat flour (atta), water, and a pinch of salt. Some people add a little oil or ghee for extra softness, but it’s optional. A typical batch uses about 2 cups of flour, ¾ cup of water, and ¼ teaspoon of salt. Adjust the water a bit if your flour soaks up more; the dough should feel firm but pliable.
Tip: If you have a little extra time, let the dough rest for 15‑20 minutes after mixing. Resting lets the gluten relax, making it easier to roll thin without tearing.
Step‑by‑Step Cooking Process
1. Mix the dough. Put the flour and salt in a bowl, then sprinkle water gradually while stirring. As the mixture comes together, use your hand to knead until you get a smooth ball. It should not be sticky; if it sticks, sprinkle a bit more flour.
2. Rest the dough. Cover the ball with a damp cloth and let it sit for 15‑20 minutes. This short rest makes the dough easier to roll out and helps the roti puff up later.
3. Divide and shape. Pinch off a golf‑ball‑size piece, roll it into a smooth ball, and flatten it slightly with your palm.
4. Roll the roti. Lightly dust your rolling surface and pin with flour. Using steady pressure, roll the ball into a thin circle, about 6‑7 inches in diameter. Try to keep the thickness even; a thinner roti puffs better.
5. Heat the tawa. Place a dry skillet or tawa over medium‑high heat. When it’s hot enough – a few drops of water should sizzle – you’re ready.
6. Cook the first side. Slide the rolled roti onto the hot surface. Let it bubble for 15‑20 seconds; you’ll see tiny white spots appear. Flip it.
7. Cook the second side. After flipping, let the roti brown lightly on the other side, then press gently with a clean cloth or spatula. You’ll hear a puffing sound – that’s the roti inflating with steam, which is a good sign.
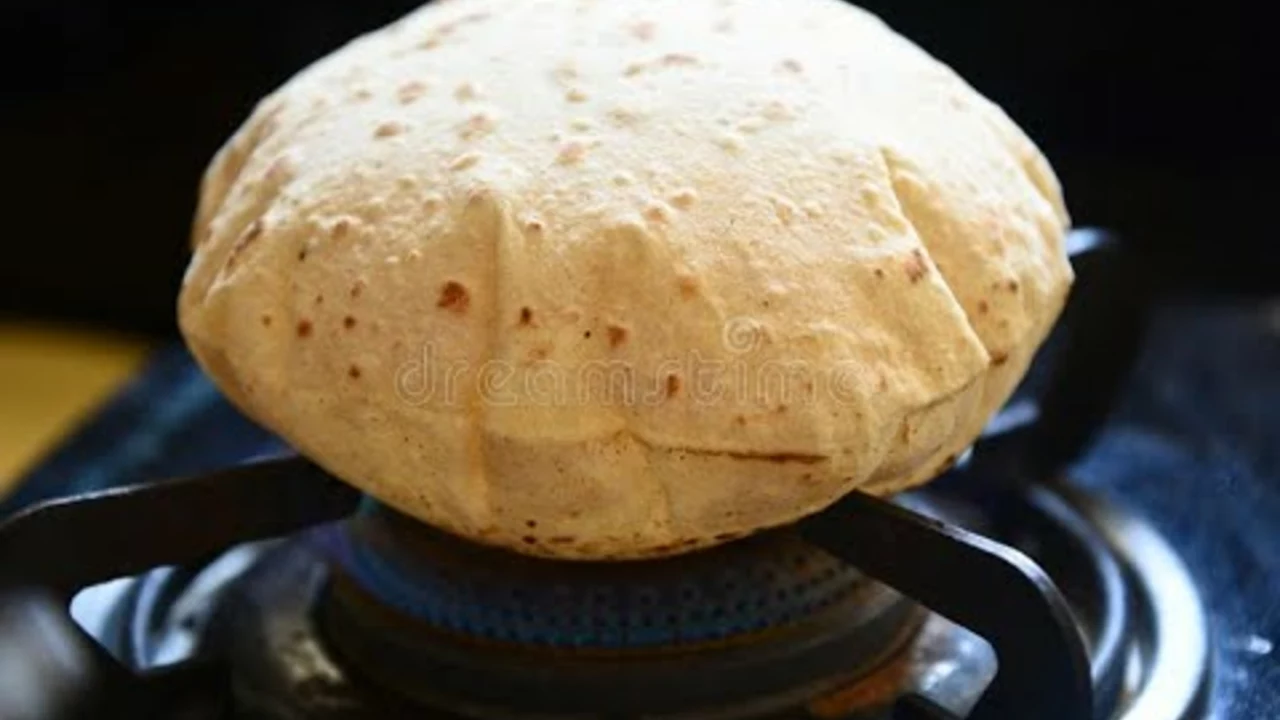
8. Finish on direct flame (optional). If you have a gas flame, you can place the roti directly over it for a second to get classic char spots. Watch closely so it doesn’t burn.
9. Keep warm. Stack cooked rotis in a container lined with a clean kitchen towel. Cover the top with another towel to keep them soft.
That’s it – a full cycle from raw dough to soft, puffed roti. The more you practice, the better you’ll gauge the right heat and rolling thickness. Don’t worry if the first few don’t puff perfectly; consistency comes with repetition.
Pair your roti with dal, vegetable curries, or a dollop of ghee for a comforting meal. And remember, the secret isn’t in fancy tricks; it’s in simple steps, a hot pan, and a little patience.
Jul 26, 2023
Indian Food: Why doesn't my roti puff up?
0 Comments
In my recent exploration of Indian cuisine, I've noticed a common problem many encounter - the roti not puffing up as expected. The main reasons could be the dough's consistency, the pan's temperature, or the kneading process. If the dough is too stiff or too soft, it won't puff up. Similarly, an overly hot or not properly heated pan can interfere with the puffing. Finally, not kneading the dough enough can also prevent your roti from achieving its desirable fluffy texture.
Read More